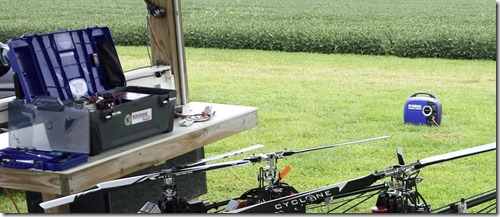
Virtual Reality Car Racing and Flying Simulation Rigs

drivingrig_2950

Recently I decided it might be fun to see what VR was about. I’ve never been a gamer and I didn’t want to waste a lot of time, but I did want to get a good feel for where the current state of VR simulations are. I think you have to own a system to have adequate time to get a feel for it.

My expectations were initially a bit low. I had read about the screen door effect, god rays, and complaints about resolution, field of view etc.. However I was surprised at how well Gen 1 headsets work. Yes, I can see the pixels, but it is immersive and you tend to forget about the pixels pretty quickly and just react to your virtual environment.

VR Hardware:

I started with an Oculus Rift system with 2 front firing and 1 rear firing sensor. The Oculus Touch controllers are excellent and with 3 sensors the head tracking and Touch tracking are excellent. The Rift is also relatively light compared to most and has pretty good quality headphones built in. I mounted the sensors on tripods in my media room.

There are many headsets available including the Vive, recently released Windows MR headsets such as the Samsung Odyssey, and kick starter headsets like the Pimax. I picked the Rift because a number of the simulation titles are optimized for Oculus and it’s low price of $350. VR headsets are in their infancy and will evolve very quickly so I consider them somewhat disposable like early digital camera bodies, and I don’t want to debate which is best because something much better will make them all obsolete quickly.

24955526_1717763091627477_4921177560631060677_o

VR software support:

  • SteamVR – supports everything
  • Oculus – supports only Oculus
  • ReVive (takes Oculus only titles and allows Vive / Windows MR headsets to work with a slight speed penalty)

Titles written specifically for SteamVR seem to work uniformly well on everything. This is a great standard that the Vive/Oculus and Windows MR headsets can use.

Titles with direct Oculus support will run faster on the Rift. Many of the car racing games have direct Oculus support and SteamVR support.

ReVive involves an overhead process to make other headsets talk to Oculus only titles.

Purchasing VR titles:

Generally you will want to purchase your VR titles through Steam since they will work with anything. If you purchase through the Oculus store the VR titles will only work with Oculus devices.

Computer Hardware:

i5-4690K, 16Gb, 250Gb & 1Tb SSD’s, GTX Titan
Windows 10 Professional

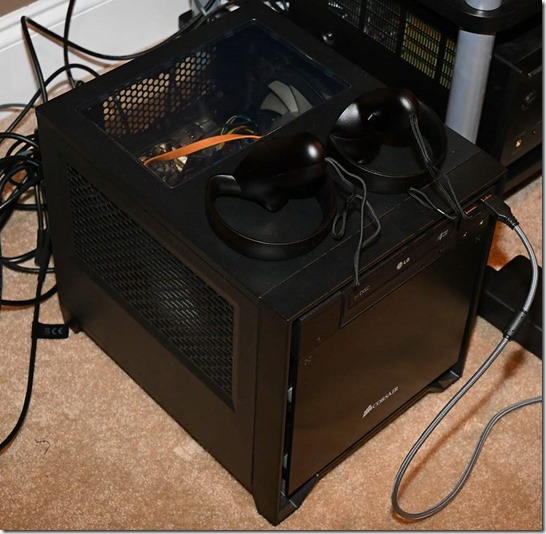
This is a small mini-ATX computer I put together for my RC Helicopter flight simulator a while back and it’s doing a pretty good job with gen 1 VR, but I don’t have all the settings cranked up. Likely the whole system will need replacing for the next generation of VR headsets. Obviously there are much more powerful systems out there and a GTX 1080TI or upcoming Volta card would certainly be much more powerful.

My Oculus Rift headset and 3 sensors use all 4 of the USB 3.0 ports on this computer and the HDMI graphics card port. I’m running a DVI port to the TV on the wall. One front USB 2.0 port supports both the wireless mouse and keyboard. That leaves 3 more USB ports. Only 1 of the front ports is needed for my car racing rig because it is an integrated ecosystem that all plugs together. My flight rig uses all of the remaining 3 USB ports.

VRcomputer_2947

A few things about VR:

VR Nausea:  There are two things that can cause nausea in VR.

  1. If the computer is unable to generate a solid frame rate of 90fps the head tracking may stutter or lag and cause queasiness.
  2. The other bigger issue is when you see yourself moving in VR but can not feel the accelerative forces on your body.

There is a rating system for VR titles based on how much motion there is.

  • Comfortable
  • Moderate
  • Intense

An example of a Comfortable title is Oculus’s Robo Recall which is a lot of fun. It works best in room scale and you are swinging around shooting and grabbing derelict robots. There is lots of action, however you teleport from place to place and never experience motion.

A Moderate title would be Mission ISS or Lucky’s Tale. In Mission ISS you can grab handles and move around in a weightless environment. In Lucky’s Tale you move like a balloon tethered to the main character that you control like a character in Mario Brothers.

The car racing and flight sims are Intense. There is lots of motion happening in VR that you don’t feel in real life and for some people that causes queasiness. My son had no issues. However I can remember the first time I slid off the road in Dirt Rally and threw my car in reverse. My stomach did flip flops as the car flew backwards and I felt nothing. FWIW I think car track racing games are much easier on your stomach than titles like Dirt Rally ( which is my favorite VR title )

I have one other title that is rated Intense for a reason other than motion. It’s called “The Climb” and it’s rated Intense because of the potential for vertigo while you are climbing a cliff face with your bare hands hanging hundreds of feet off the ground.

The good news is that after about a week or so I got used to this and it was no longer an issue. Until then I found ginger pills taken with food 30-60min before playing helped me get through half an hour or so of game play. Now I can play for over an hour with no ill effects.

My Car and Flight Rigs:

I found out very quickly that like anything else you can spend an unlimited amount of money on these rigs and they can get very heavy and bulky fast.

My constraints were:

  • Space – I wanted something I could foldup/break down and stow in the closet.
  • Quality – I wanted something very good so I didn’t have regrets or feel like I missed out on the experience, but with a solid following and strong resale value when I was done.

Shared Seat:

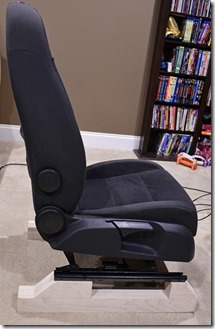
I ended up with a 2008 Volkswagen Passat fully manual passenger seat from a local junk yard for $40. Passenger seats tend to have less wear. It slides front/back, reclines, has lumbar support and the seat bottom lifts up to become more upright which works well for flight sims and then drops down which is better for the car sims. I took it home, pressure washed it, used my shampooer to pull most of the water out. It cleaned up nicely.

I just had to build a basic support for the rails with a cross member that I could use to secure it to the two rigs.

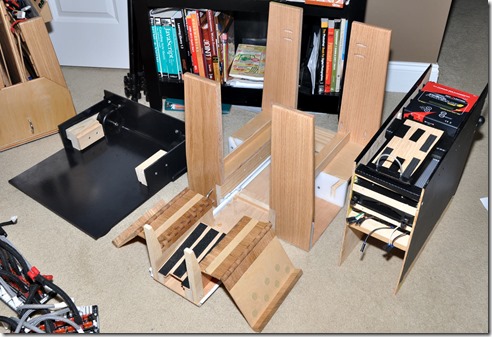
Down for car racing (left) , Up for the flight rig (right)

seatdown_2942seatup_2943

Building a Car Racing Rig:

To gain portability the chair detaches from the controls and the controls collapse down. I went with a Wheelstand Pro 2 and RGF attachment to hold the shifter. It was never designed to support a hand brake which I could easily pull forward, but a ratcheting strap took care of that issue.

Granted an 80/20 frame or something like an RSeat RS1 would be more rigid, but in VR, I’ve not noticed any issues. The critical thing is that I can get on the brake hard and I can pull back hard on the hand brake.

rigstrap_2949

The controls are all Fanatec ClubSport equipment.

  • Clubsport 2.5 Wheelbase
  • Porsche 918 racing wheel
  • Clubsport 3.0 pedals & Performance Brake kit
  • Clubsport 1.5 shifter
  • Hand brake

Immersion and Vibrations:

The Clubsport 2.5 Wheelbase has two strong motors that pull in opposite directions. They produce something called Force Feedback. It adds resistance and pulls the wheel in directions based on the physics of the car. It also lets you feel bumps and the sensation of loosing traction as it goes light or goes airborne. These pedals also have a small shaker in the brake and gas pedal to simulate ABS kicking on.

A nice feature that most of the car racing software have is sharing information that can be accessed by 3rd party software. This includes information about the road surface like it’s texture, bumps and also engine rpm, speed, when the rear wheels are sliding etc. This is great for aftermarket HUD’s and is what SimVibe relies on.

In the system I’ve put together there is a transducer mounted to the bottom of the seat, the pedals and the gear shift. This adds bumps, impacts, engine vibration the feeling of your rear wheels sliding with many effects available.

I’ve found that the steering wheel force feedback and additional vibrations make driving in VR feel much more realistic and add to the experience.

actuator_2932

To make SimVibe work with my setup involved the following:

1. Installing the SimVibe software and allowing it to find the software I have installed so it could setup profiles.

2. Modifying the profiles to taste. They can be done by title and even by specific car in each title.

3. I’m using 2 x  1.8” stereo to RCA plugs from the computer to an old AV receiver to drive 3 transducers.

From my experience having vibrations in the seat of your pants matters most followed by the pedals. The gear shift having engine vibrations adds but not nearly as much.

The end result is very impressive and feels believable. I could play for half an hour and work up a bit of a sweat pulling against the wheel and driving.

Flight Rig:

For flying I’m currently only using DCS World which is downloadable with a couple aircraft on Steam for free. However I also got their Huey, A-10, F-15, and P-51.

The HOTAS is the Thrustmaster A-10 stick and throttle.

The pedals are MFG Crosswinds from Croatia. I also ordered a 3” extension pipe for the stick from MFG when I ordered the pedals. The extension really helps.

There is a lot more plywood work on this. Basically the seat is slid until the foot pedals feel right, then the stick is slid up to the front of the seat and the throttle is slid to a comfortable position.

flightrig_2924

My flight rig does support vibrations in the seat through a different software package. You can feel rumble on the runway, various vibrations, projectiles firing etc..

Car Racing vs. Flight vs. Other VR

This is a very personal thing. There are arcade experiences as well as realistic simulations available for both.

If I have a friend over, the car racing sim is much easier to get going quickly since most people know how to drive. The flight simulations can be very involved and there are lots of switches to map and training involved before a person can dive in.

For some aircraft you can spend hours just learning all the controls, how to do a preflight, starting the engines up and taxi out to the runway and take off. It can also take a while to learn how to land and use all the weapons.

Car racing on a track frequently involves shaving fractions of a second off times. If you want a realistic racing experience iRacing has races that kick off every hour and that try to bin real people by ability level. There is no AI, and they use the full rules of racing.  Others like Assetto Corsa and Project Cars have AI drivers allowing racing without Internet access, but also have online multiplayer racing. However they allow doing things like turning off damage and making things easier for the racers and can allow a group of friends to start up a race by invitation only.

There are lots of ways to enjoy these simulations and I would argue that VR is much more immersive when you have a complete set of REAL controls at your finger tips. I felt like I was flying a Huey helicopter and it is an interesting experience.

In real life I have Autocrossed, done a Rally, and had flight instruction in a Cessna 152 and a couple sailplanes.

Real life experiences are fantastic, but I will never drive an ultra expensive Rally Car around hairpin turns on cliffs in Greece, or go airborne over sharp hills in Finland. Real life for those experiences is simply too dangerous and expensive for me to do in real life. I’ll never fly an F-15 or P-51, etc.. or “free solo” climb up a rock face. VR allows me to get a “taste” of what doing some things is really like and that is where I think VR shines.

I’m still not a gamer and I enjoyed building my rigs and figuring out how to make everything work more than playing VR games. However I have enjoyed the VR experience and I’m very sure that the software titles will become more and more compelling over time and the immersion more and more realistic.

I’m very excited about where Augmented Reality is going and I can see some serious real world uses for that well past games.  VR can already be used as a training tool, but I see AR as potentially being a new level of day to day existence.

Update: 1/23/2018 I’ve been playing Eve Valkyrie Warzone with  my Flight controls for a few weeks. This is a childhood fantasy realized. It feels like I’m piloting a space fighter launched Battlestar Galactica style from a space carrier with a team of real and AI players pitted against a  team of real and AI players. I’ve gotten more grins from this game than anything I’ve experienced to date.  The production values of this game are excellent. The sights and sounds are perfect.  As you progress your rating increases and you are grouped with a team and opponents at a similar level. As you level up and get better so does your competition. As a result the game changes over time keeping things interesting.

2017 Fall Wood Working Project Multimedia Room Table

This is the most satisfying wood working project I’ve done to date. I’m really enjoying this piece on a daily basis. I apologize if I’m a bit proud of it.

coolreflection

We had a non-ideal table setup in our media room that I cobbled together a couple years ago.  This time I wanted something with 3 shallow drawers in front with no knee hazards and a large snack try that pulled out in back for big bags of chips and pop corn etc.. And this time the joinery and finish work were going to be less “utilitarian” looking.

The table top has a Bar Top Epoxy finish and the rest is Arm-R-Seal over SealCoat.  There is a book matched piece of Bird’s Eye Maple in the center with Ebony accent strip, framed with highly figured quarter sawn white oak and banded in Ribbon Sapele.

The snack tray bottom is Curly Maple with Bird’s Eye Maple front and back and sides of white oak.

readytouse

donetable1

The picture below was before final shaping and finish, but I like the angle. Notice the tolerances on the drawers. The drawer fronts were cut from a single piece of glued up birds eye maple, sapele and white oak with a thin kerf bandsaw blade and finished with a hand plane on a shooting board so they look nearly solid.

featurecomplete2


trayveneer_2609

The project started off at Jeffery’s Lumber to find some pretty hardwoods and I only started of with a basic plan and figured everything out as I went.

It was killing me that my small bandsaw could only cut 4.5” thick wood and I didn’t want 4 panels in the top of this table, so I bumped up to a bandsaw that could resaw up to 14” thick.

bandsawdone

I was also not happy with the work surfaces around my table saw so I built a couple infeed/outfeed/ side tables for my table saw.

infeedoutfeed_2431

It all started with the center piece of the table, the Bird’s Eye Maple. This is the book match cut. I started the piece with the table saw top and bottom to try to manage any drift.

cutveneer_2443

This gave me the focal point I wanted for the top of the table.

bookmatched_2444

I started with a core piece of 3/4” baltic birch with the hope that using veneers and glue would make the piece stable long term. So I started by banding the core with Ribbon Sapele.

Sapele

After banding the baltic birch with Sapele, I block planed and sanded it flush.

Makeedgesflat

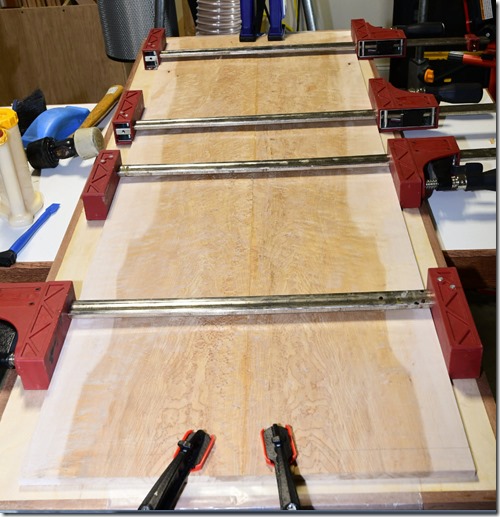
Then the bookmatched Bird’s Eye was glued together.

gluebookmatch

I decided to use an Ebony Accent and I learned that Ebony darkens after exposure to light and air. Below are 4 strips of Ebony, showing freshly cut top, exposed to sun and air for a few hours middle and the dark edge bottom.

ebony

The the center piece is sandwiched between Ebony and White Oak ends, then the entire length was run through the table saw to get a clean edge on both sides before it was glued to the baltic birch core.

glueup_2480

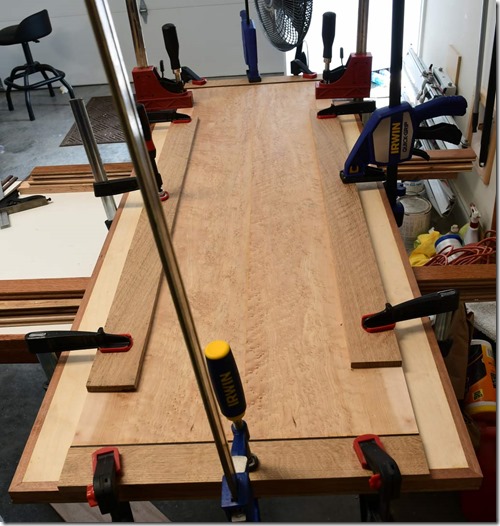
The front and back edging was then glued on.

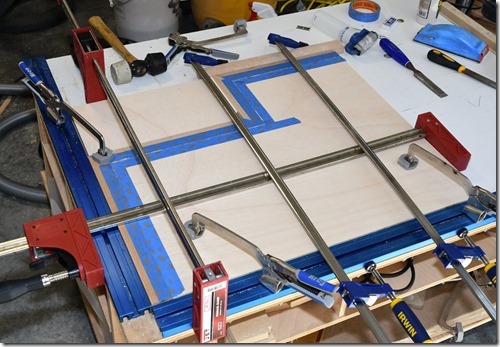
clamps2

Then I spent some quality time with my #6 hand plane and got the table top flush.

no6planer

planesides

This is probably not the way most people would do this, but I ran the table top over my router table rather than running a router around the table.

readytoroute

Then after some time with a random orbital sander it was ready for a protective coat of SealCoat while I continued on the rest of the project.

prepped

It’s worth noting that I tried a number of stains, oils and dyes, but my wife liked the natural look of the wood so it was just Shellac for now. In my eyes this was beautiful.

sapeleside

There are 1/8” slots routed in the 1/4” baltic birch plywood center panel for the drawer supports and 3/4” plywood sections with brass inserts to hold the legs.

bottomrouted

Each leg has 3 bolts holding it in place.

fitedlegs2

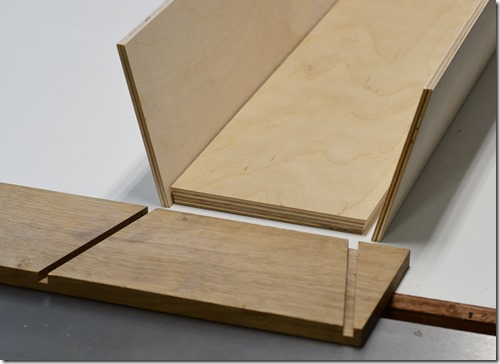
Switching to the snack tray. There are 15 degree dado slots in the sides to hold 1/4” baltic birch plywood core and there is a 1/2” baltic birch bottom core.

fifteendegrees

snacktrayfitted

With the tray fitted between the leg supports, the drawer sides and supports are cut.

stoppingpoint090517

For assembly disassembly there needed to be two holes in the side drawer supports.

boltaccesspoints

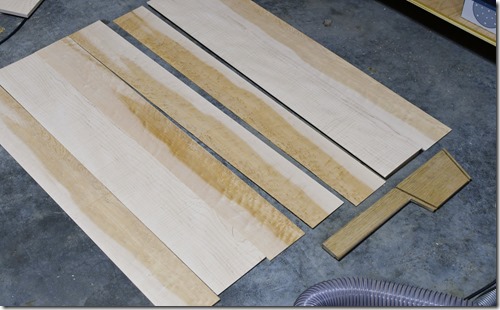
Created interior and exterior veneers for the snack drawer out of Curly Maple and Bird’s Eye Maple.

trayveneers

Glued up the snack tray veneers.

glueveneers_2589

Started work on the legs with edge banding and leg supports with 1/2” fascia boards.  Glued up the strip for the drawer fronts. Cut veneers for the legs.

stoppingpointtoday

Started gluing up the legs.

buildinglegs

Dado cut 1 1/8” thick white oak front and back pieces that created an I-beam like structure and got those fitted. Did some rough shaping of the feet.

legscapped_2695

Legs shaped and sealed.

sealedlegs_2699

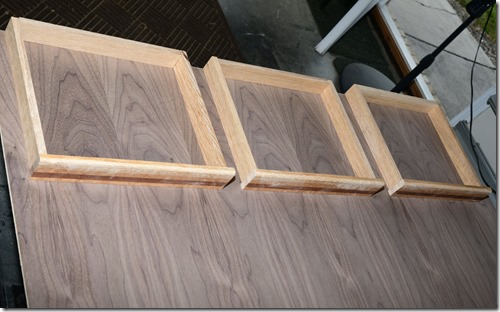
Picked some pretty Walnut veneer patterns for the drawer bottoms.

WalnutVeneerPlywood

Routed the slots and cut runner pieces for the drawers.

routedrawerslides

Glued the drawers together without drawer fronts. Then with careful attention to the drawer front placement glued the drawer fronts on in-situ.

featurecomplete

It is now feature complete and ready for final sanding and finish.

featurecomplete1

Taped up the bottom of the table to allow me to peel off Bar Top epoxy drips.

maskingtapeundertable

I had closed off this room, shut the vents and left the table in there to set overnight to let dust settle before putting the epoxy on.

Epoxy is down, now to patiently let it dry for a few days…

Letitdry

Then I put the legs in tightened the bolts and put it in my media room.

This is probably my last project of the year while I focus on other things.

2017 Summer Wood Working Project Walnut Plant Stand

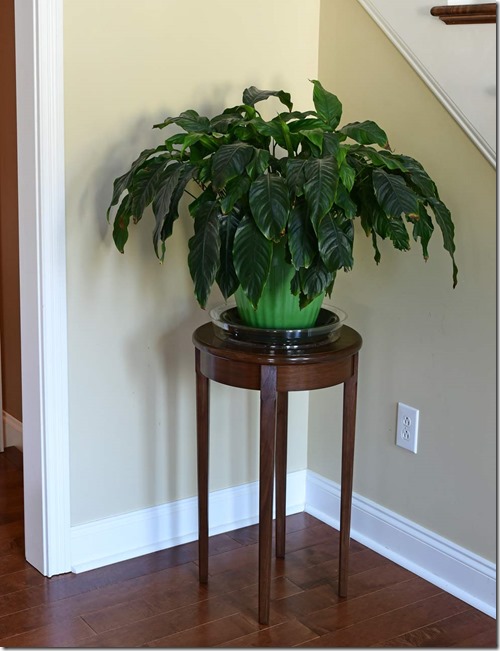
We had a square table in our front foyer holding a plant and one of our cats would sit on the corners of that table and eat this plant. So I built this round table to protect the plant and it seems to be working. This was my first solid hardwood project.
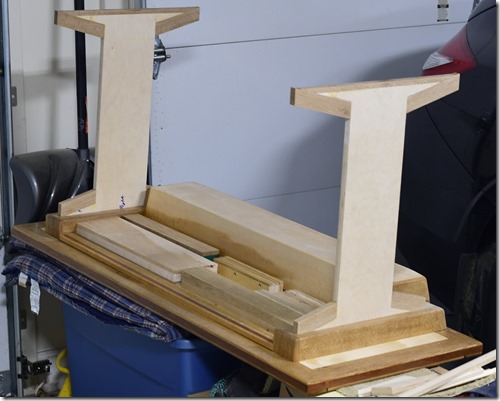
inplace_2366

Started by gluing up a beautiful piece of 1” plus thick walnut.

walnutglueup

walnut_1977

Used carpet tape and a shallow 1/8” guide hole to center this walnut slab on a 1/2” piece of plywood backer. Used my new router circle cutter to cut and spiral bit to cut the table top.

cuttingwalnutcircle

Used a downcut spiral bit to cut a slot for the skirt in the underside of the table top and then used a round over bit on the top of the table.

downcutspiral

Resawed slices of walnut to make the round skirt.

cuttingveneer

Here is the fully routed table top and 1/8” veneer strips for the skirt

walnutstripsandtop_2053 

Glued the skirt using Titebond III for more working time.

GlueupSkirt2a

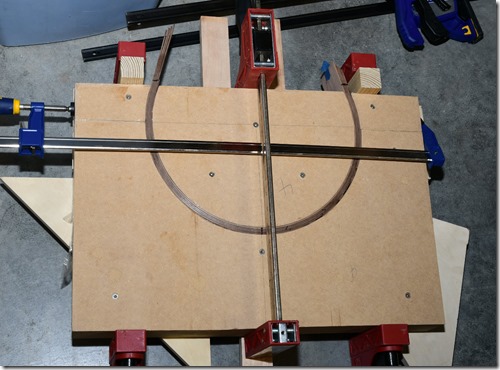
Created an MDF form to create two halves of a circle to make the skirt. The form is just 1/4” smaller in diameter than the slot in the bottom of the table top. Thinner sheets of wood with more layers of glue hold shape better than thicker sheets with fewer layers of glue.

finalskirtjigging

Cleaned up the edges of the skirt with a block plane and card scraper.

SkirtRev2a

This fit the slot perfectly.

SkirtRev2d

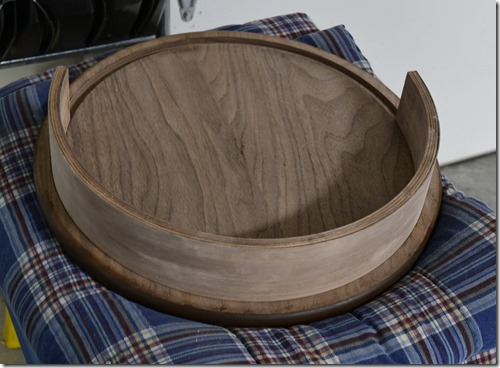
Glued together a second circle half.

secondskirtperfect

Started finishing the table top and skirt.

startingfinsihing

Cut 4 square legs to start with.

legssizedsquare

Routed a 1/2” slot into the legs to fit over the skirt and then chiseled a curve and flattened out the top of the slot.

tablechiselwork_2274

Started to fit the legs on the skirt. Two legs hide the lap joints of the skirt.

tweaking_2279

Created leg supports out of the corners cut off when making the table top.

tablesupports

Fit the supports and legs to the skirt.

tablesupports2

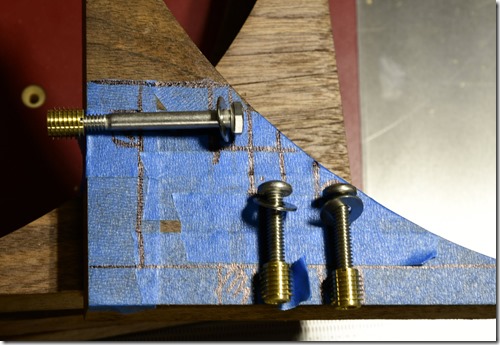
Added brass inserts to the table top.

addbrassinserts

Added brass inserts to the legs and decided to add a floating tenon for additional stability. it is glued only to the leg.
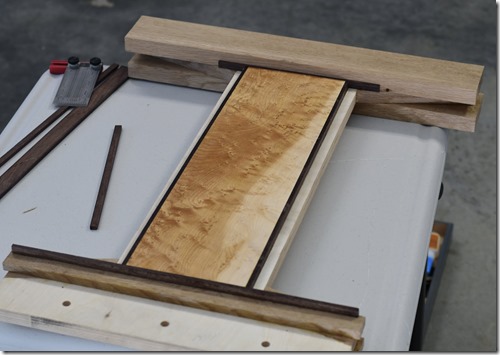
splineinplace

Practiced cutting legs with a tapering jig.
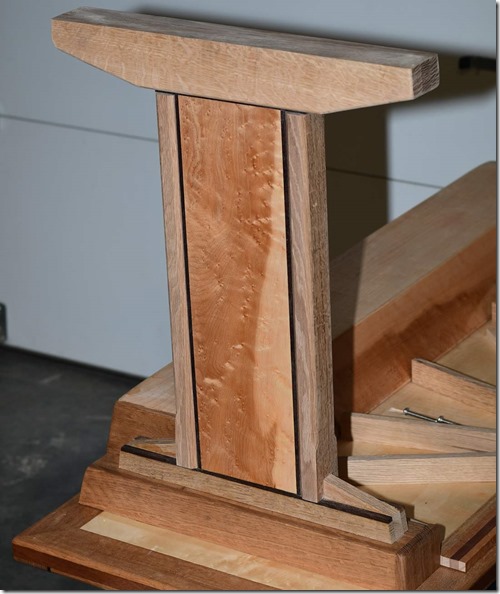
taperjig

Created a few out of pine to see what would look good.

taperd_1997

Cut tapers in the walnut legs and stained everything.

staindown_2329

Applied Arm-R-Seal and completed final assembly.

underside_2359

underside_2361

The skirt is floating and not glued in any way. The legs hold the skirt in the table top slot and the skirt helps hold the legs in place. The legs are held by one 1/4 20 SS screw and a floating tenon and the leg supports are held by two 1/4 20 SS screws.  It can be completely disassembled to 11 wood pieces and 12 SS screws.

walnuttable_2353

2017 Spring Wood Working Project Chest of Drawers

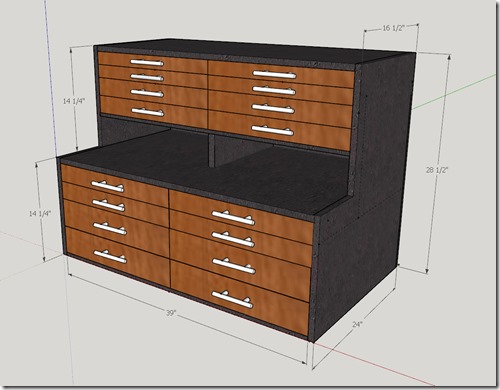
I wanted storage space for my RC Helicopter tools and parts for my office and couldn’t find anything that existed. This is the design I came up with and built.

chestofdrawers

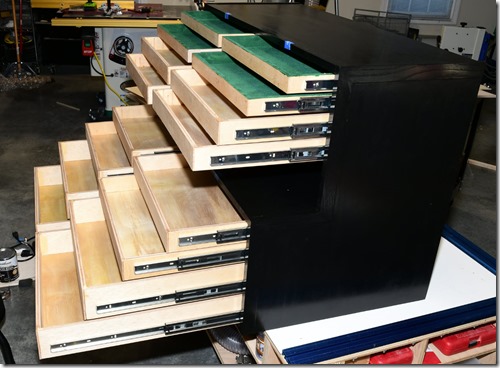
Here is the finished piece.

newtoolchest_1882

OMGdone

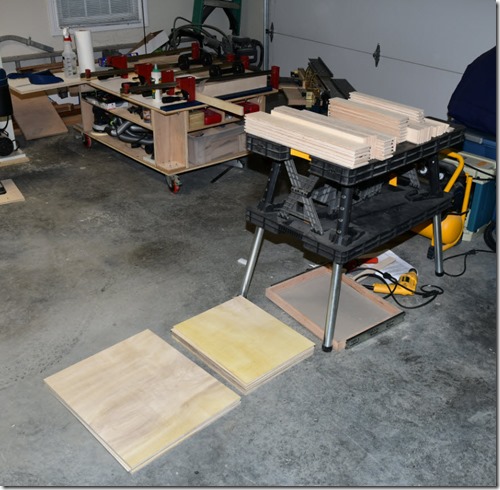
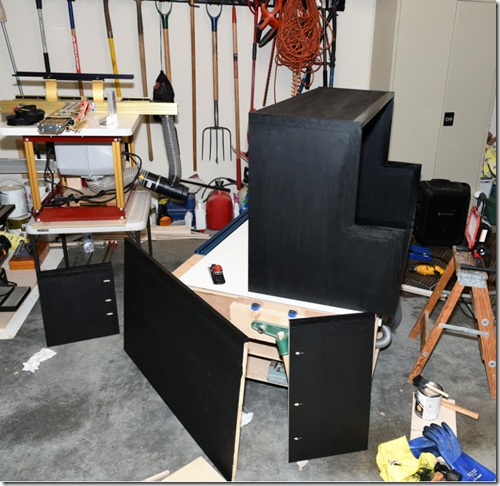
Cut the drawer pieces out of 1/2 and 1/4” plywood. Routed the drawer sides with drawer lock bit and used a 1/4” rabbet on the bottom rather than a slot to conserve valuable vertical space.

GluingUpDrawers

Glued them up.

GluingUpDrawers2

Stacked drawers in a mockup of the final configuration with full extension slides as spacers.

drawersbuilt

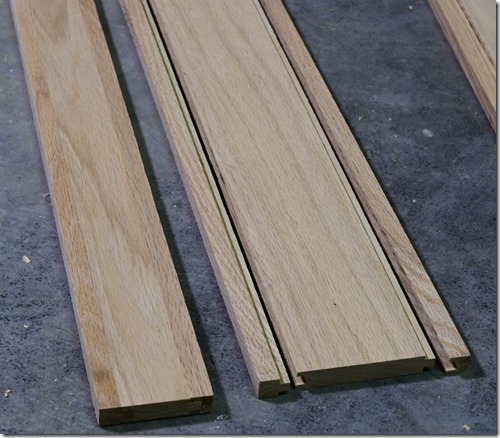
Planed reclaimed red oak flooring to 1/2” and tongue and grooved the pieces so there was a 1/2” band at the top and bottom of each fascia board. This helped keep the boards true and they have remained extremely flat.

FasciaBoards

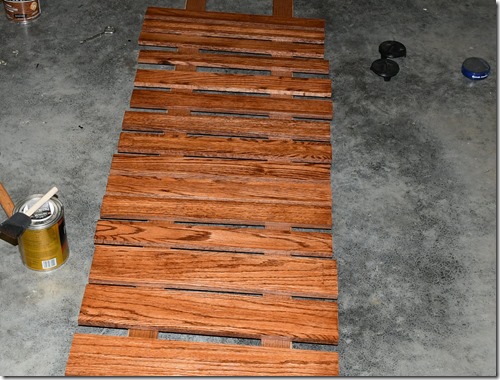
Glued up fascia boards.

fascia_1578

Stained.

stain_done

All of the drawers and fascia boards neatly stacked.  The black board on top was an experiment with reclaimed flooring that didn’t work well.

topdeckdone

Cut and banded 3/4” plywood with 3/4” red oak boards for the carcass.

bandingplywood

Created tongue and groove slots on the top, bottom, left and right panels that fit snuggly together perfectly square while dry.  During glue up they were tighter and required lots of rubber hammer and clamp pressure to pull them tight.

tonguegrooverouting

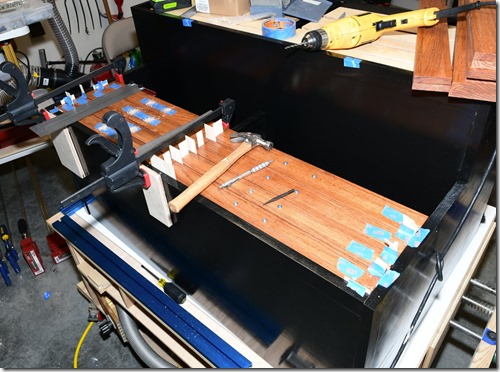
Decided to flock the top 4 smallest drawers that hold lots of small tools.

flocking1flockinginset

Rough fit of everything.

roughtFit

Stained the housing black

stainingcabinet

Glued the main enclosure together and used pocket screws for the center supports and mid horizontal surface.

staintouchup

Created wood tooling for mounting the drawer sliders.

firstdrawermounted

All drawers fitted

drawersin

Fitted and shimmed fascia boards, then marked holes and drilled holes for handles. These two screws also hold the fascia boards in place and allow for minor adjustments to get them aligned well.

drillinghandles

Cabinet is now complete.

firstsemifinishedlook

toolsflocked

2017 the year of the Woodworking bug

This is the year that the woodworking bug bit me hard!

My biggest limitation has been that my entire shop has to fit into a 6’ x 13’ area when I’m not using it. This means that EVERYTHING is on casters and that I take over the entire garage in various configurations as needed. Some tools like my planer sit on the floor and are not at an optimum height.

This is my shop area fit into the back of the garage with a stop sensor for my wife’s car.

shopsquished_2419

My work surfaces tend to be multi-use and collapsible. I built two folding tables that quickly attach to the front back and side of my table saw to act as 4’ long in feed, out feed, or side support tables.  But they only take up a 1’x2’ of floor space when I’m not using them.

sidetable_2436

I built a rolling power tool bench / glue up table / storage unit that continues to evolve. It is not the perfect height for everything, but it works well enough.

routerdrawer_2163

mobileworkbenchorganization

It also works as a glue-up table using Kreg Auto-Max clamps and an easily replaceable  not stick top.  It also has a large end vice and supports to hold a large piece of wood off the floor or level. 

maskingtapeglueup2

My clamp rack is a 2 stage ladder hung to the side wall. Notice another folding table against the wall.

clampstorage_2575

My other limitation is that I have only two 20A 120V circuits to work with. Technically I had one but I’m now sharing a circuit with the overhead lights which are now LED’s that sip power.  My dust collection system shares the circuit with the lights and a single power tool at a time runs off the other.

This has proven to be very workable and while it might be nice to have a seriously powerful table saw or band saw, so far it hasn’t kept me from doing anything.

There is only one tool missing and that is a jointer. Unfortunately I don’t see the point in a small jointer and I don’t have the room for a large jointer or have the power to run it so I just have to deal with limitations for now.
My work around for this has been hand planes which I have developed a real love for. They can handle figured wood as well as or better than a helical blade jointer. There is also something very satisfying about making fine shavings with a hand plane.

no6planer

A proper shooting board can create perfectly square ends. I built this shooting board based on Rob Cosman’s recommendations.
His video –> https://youtu.be/YyfvygylyJg

shootingboard

With the exception of my shooting board, I have never built anything based on plans or someone else’s design. I enjoy designing things that I can’t buy. The fun part about wood working is that there is always a new technique to learn and then find a created way to apply.

I recently designed and built this walnut table for my front foyer. The specific need was to replace a square table with something that had no room for a cat to sit and eat the leaves. He cried a bit, but it was a success.  I also learned how to make a circular form, laminate hardwood, cut tapered legs, use a circle jig and build a loose tenon support system for the legs. Other than a single glue seam on the table top there is no glue holding the skirt or legs on and it can be completely disassembled into eleven parts.

inplace_2366

Smaller Charger ( one more time )

15138516_1211870472216744_2003843386372980437_o

This is the last one finished in November 2016 . I still had the 2 x PL8’s and a 1kW PS  from my first too heavy to carry charger build and I wanted to be able to use them. This is a very simple rugged and lightweight package.

I started with a cardboard mockup.

14563466_1161472813923177_5121044860001916247_n

Then moved to a wooden prototype

14612555_1178339248903200_4890286125666126106_o

Then I moved to ABS and screwed into UHMW blocks.

15110454_1211872015549923_2035514202253401525_o15025240_1208418839228574_8623812209778795309_o14195357_1208418992561892_900528871260773791_o

Finally it joined my last Charging Tower and is what I continue to use today.

I still have the battery storage unit from the first build, but I don’t use it often because of it’s size.

ThreeGenerations

Frequently before I head to the airfield I’ll charge a bunch of batteries running both chargers.
chargingcapacity

Charging Station Reprise (with BUMP controller)

Finished1

A couple years back I built an over-engineered charging station with battery storage that was worked, but in practice was too heavy and cumbersome.

Last year I went in a different direction. I wanted light, simple and twice the charging capacity.

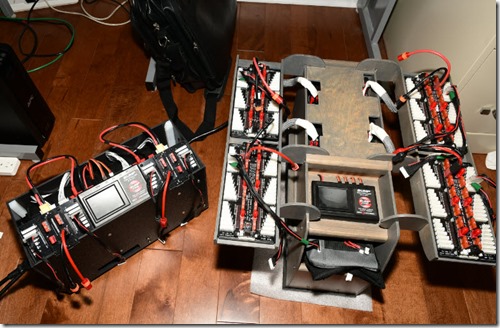
I started with 2 x Dual PL8’s,  4 x MPA boards and a Meanwell 2kW 48V PS.

plywoodPrototype2

The Meanwell charger is quiet with a variable speed fan and has power factor correction to help minimize the load on my generator at the airfield.

I had pre-ordered a BUMP controller in October that arrived January 30th, so I started without it and just used a cardboard placeholder.

plywoodPrototype9

The MPA boards Velcro to the sideboards that connect both horizontally and vertically.

plywoodPrototype27

This year I decided to go for a stained finish. I used a gray stain and urethane top coat.

plywoodPrototype30

donebuild3

BumpInUse

Building the Ultimate RC Charging box / Battery Caddie

This winter I had a project. I wanted to design and build the ultimate charging box and battery storage for my needs. This is what I ended up building.

ChargingTowerInUse

caddieinuse2


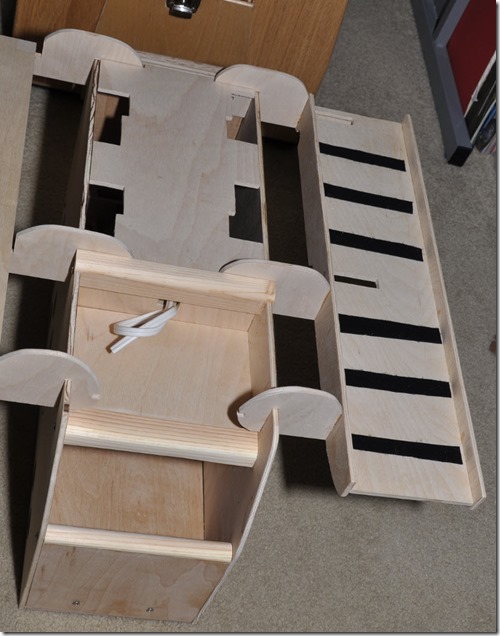
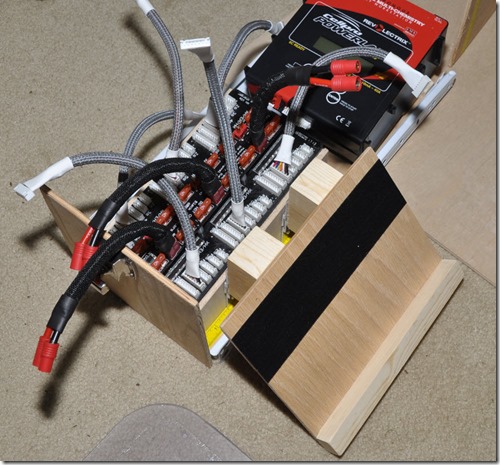
I settled on a three part solution.

Part 1 Charging Box 

  • Hold 1x powersupply, 2x PowerLab PL8’s and 2x MPA 6 balance boards
  • Make my PL8’s and balance boards conveniently accessible.
  • Hold my batteries conveniently for charging
  • Store my batteries
  • Show the charge status of each battery ( Charged, Flown, Balanced)
  • Run off AC or Battery at the airfield easily
  • Help get everything out to the airfield from my car easier

Part 2 Battery Caddie

  • Easily carry just my batteries to the air field
  • Keep my batteries organized and keep track of their charge status.
  • Carry some tools

Part 3 Battery Storage

  • Must be easily transferred from the Charging Box to the Battery Caddie
  • Keep track of the battery charge status
  • Have an integrated platform to present batteries for use and to charge

This was a winter project for me and I took my time with it and iterated quite a bit. I started out mostly working on the dimensions, features, overall design and used a bunch of metal hardware that screwed together. Then as I got into wood working more there was a transition away from metal hardware and screws to wood structure and glue.

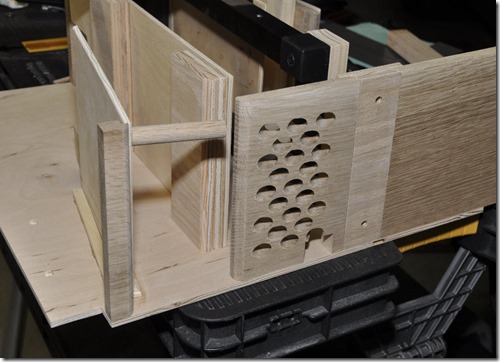
Starting from the early prototypes I was trying to get convenient access for 2x PL8’s and 2x  MPA boards and battery storage.  Here you can see the battery storage clipped on.

PrototypeCase2

I wanted a way to support the batteries when charging from both balance boards. Using aluminum clips to hold the battery charging trays in place.

batteryWing2

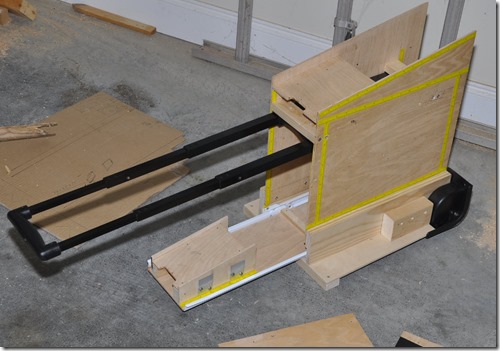
It was going to be heavy enough with PS, Chargers, Balance boards, and especially batteries that it needed a strong frame with wheels and a luggage handle.

HandleOut

I did a lot of prototyping with cardboard because it was fast. Below are the cardboard folding charging wings and the next version of battery storage which used a removable 1” dowel hinge.

foldingChargingDrawOpenbatterystorageHingeDone

Then the cardboard was replaced with wood, metal hinges and lexan. The battery storage had to fold up to stow. The wiring was also coming along.

progresscase13terminalblockPoweredBack

A hinged lexan window for the batteries was added and some front facial.

whitecase6

Of course it needed a cell phone charger on it Smile

whitecase2

Then the ability to charge with Deep Cycle Batteries was added. This Power supply allows for DC Voltage across the output terminals. This is not always the case.

DCPower1rearHandle2

The aesthetics changed over time. Red and Black CF look vinyl seemed like a good way to clean things up quickly.

RedandBlackfaciatoolstorage2

There was a little space between the top balance board and the power supply. Perfect space for a tool storage area Smile

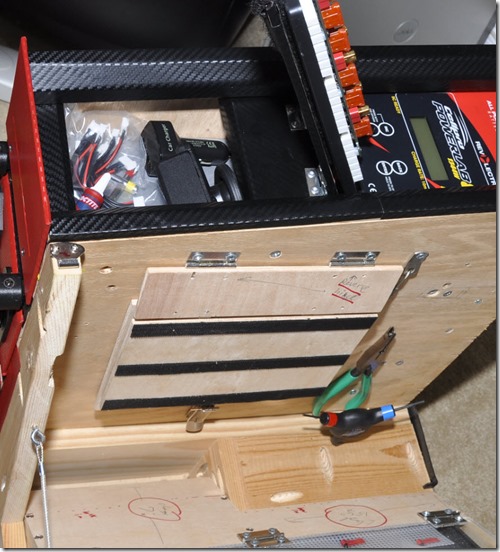
toolstorage

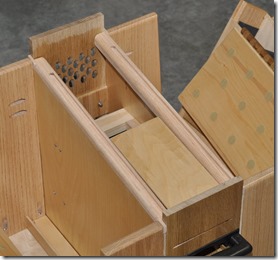
The battery storage still seemed too complex. requiring a removable dowel and a cord to keep it from laying flat. So the next step was adding slots and pegs to hold the battery storage in place. This way it could just slide into place supported at an angle and then able to slide to upright.

mockuphingerReversednewHinge1

The charging tower was finally nearly fully functional.

newbottom

It got it’s first field test and worked well, but came home with very muddy wheels and no good way for me to bring it in the house without lots of cleaning effort. That lead to the bottom becoming removable for easy cleaning.

fieldTest1

This is when my project went from prototyping functionality to woodworking and learning the basic skills needed to construct something a bit more finished looking. The project was on hold while I tooled up my shop and learned how to use my new tools. I built a mobile tool bench / gluing table because of limited space. The right picture is my entire shop compressed into a space in front of where my wife parks her car.

densestorage

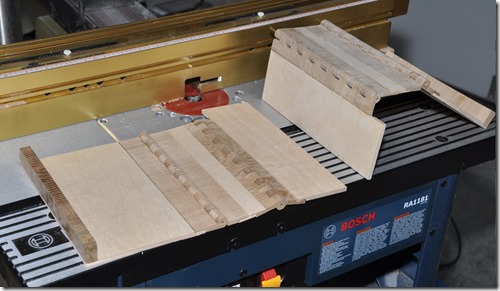
Now I could cut with accuracy and do things I was ill equipped to do earlier like making wooden hinges.

HingesFinal9

So now I could remove all the ugly pop riveted metal hinges and use something much prettier to look at.

lowerhingeleft

Another design change. The battery storage hinged doors would double as the battery charging platform. This had the added benefit of them serving as a nice platform to put your batteries on while flying. Prototyped with metal hinges.

batterystoragewing2

Then it was time to upgrade the Battery storage slots and pegs to something more durable, UHMW and aluminum. First a little tooling to make sure all the slots were uniform as 8 total were needed.

slotjigaluminumpegs

Now things were starting to look prettier.

testfitlowerwingsNewFrontpanel1

With precise cutting the battery storage became cleaner looking to and much stronger with 1/8” hardboard dividers glued into place with 1/8” neoprene cushioning for the batteries.

latestbatterystorage1neoprenedividers2

RightbatteryStorage2RightbatteryStorage1RightbatteryStorage3

Then it was time to work on the removable base out of 1/4” ABS. Using a band saw holes were cut for the wheels and then using a heat gun and a 1” dowel a bend needed to be made.

bendABSremovableBase2

The release mechanism was very simple. A bolt and knob would release it and let the base slide off to be hosed down separate from the wood and electronics.

removableBase3

Next I jumped ship to the battery caddie which is the lighter weight battery storage system that would accompany me to the airfield most of the time. Once again prototyping in cardboard. This is where the interchangeable battery storage units start to make more sense.

batterycaddiebatterycaddieproto2

batterycaddiebuild2batterycaddiebuild5

The battery caddie went together very quickly and it was time to learn about finishing wood.

batterycaddiebuild9finishingbatterycaddie

It was now time to build up the left battery storage unit and as you can see you can never have enough clamps.

moreclamps2moreclamps

Now the battery caddy had a full complement of battery storage!

batterycaddiedone2batterycaddiedone

Battery storage is finally finished and so is the Battery Caddie

batterystorageDonebatterystorageDone2

Time for a field test!   The battery caddie worked perfectly at the airfield and I had no issues with it.

caddieinusecaddieinuse2

Now back to the Charging tower. At this point the bar had been raised and it was time to tear the tower apart to rebuild it properly with what I had learned since starting this project. Luckily it is quite modular and removing the center tower is easy.

tornapart

The tower which shell which had been drilled over and over again was ready for replacement.

yuk

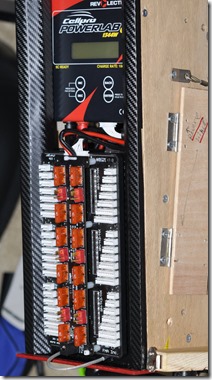
With the wood finishing so far, putting a plastic mesh in the back for cooling didn’t seem adequate, so I drilled 1/2” vent holes for the power supply and top Power Lab 8.

drillvents2drillvents

The back of the charging tower with Battery cable storage, powersupply vent and place for the rear AC outlet and handle to attach.

newchargingtower3

The front fascia.

newchargingtower2

squaringchargingtower

Test fit the new tower.

testfit3testfit2toprails1

Final wiring

wiredup2wiredup1

And done setting in my office.

stowedinoffice

In use before a day at the airfield.

ChargingTowerInUse

At the air field running of a 2kW generator.

ChargingTowerInUse3

Running off deep cycle batteries.

ChargingTowerInUse2

Finally here is a Video walking through how it all works.

Jeti wireless with Real Flight 7.0 Simulator

One reason I had never used Real Flight was that they had a large plastic transmitter dongle which was a deal breaker for me. With RF 7.0 they released a transmitter box with standard plugs for a PPM signal, so I jumped in and got a copy. ( RF7 Transmitter Interface Edition )

I opened it up and wired a servo cable to the board as shown below.

RF7toJeti

The end result after I cut the stock PPM cables off is shown below.

RF_wireless

Here is the receiver configuration through the device explorer.

image

Create a non-specific model that will work for planes and helis without any issues.

image

Map the servo outputs.

image

Map the servo channels in Real Flight 7.0.

image

Currently I have Expo configured in the transmitter, but I use the channel 8 Mode to control the head speed which is configured in the model in Real Flight.

I like straight curves for all of my Flight modes so I put the governor threshold at –106 so full negative collective in flight mode 1 doesn’t kill the motor.

image

One more step when flying from the other side of the room is to set the Reset after a crash to be automatic, and when Real Flight first comes up, press the reset button once and then you can fly from across the room without needing to touch anything.

image

RC Heli Advances in 2013

This has been a year with a lot of new electronics and other products.

Jeti DS-16 – Introduced this Spring, the DS-16 has proven to be everything I hoped it would be and I am enjoying this transmitter a lot. The voice telemetry it offers has been great including the battery mah alarms that tell me when my batteries have 40%, 30% and 25% left. This transmitter has been a surprising amount of fun to work with and that is something I could never say about an RC transmitter before.

JLog 2.5 – Introduced this summer, the JLog 2.5 is like the Rosetta stone for telemetry. It connects Kontronik Jive and Kosmik ESC’s and CC ESC’s to Jeti Duplex, Futaba FASSTEST, and JR DMSS receivers as well as Spektrum TM1000 systems.  It also offers its own sensors which allows a helicopter to have telemetry setup as Transmitter/Receiver independent. Just reconfigure the JLog2.5 and connect to your telemetry system of choice.  The JLog2.5 is now carried in the US at DemonAero.com

JLog25a

Cyclone Blades – Released in May, these are very efficient blades that really do add time to each flight. They are great for 3D flying and seem to add pop at low speed and I have found I’m getting over 1.5 minutes of additional flight time at lower head speeds than I was with my Radix 710mm blades that I also am very fond of. I really like how they feel on my TDR and look forward to seeing Cyclone’s other sized blades.

Skookum SK-GPS – Released early in the year, the SK-GPS was a very useful tool for me and allowed me to get over the fear factor of trying a number of new things. I think it can be a very helpful learning tool, however once I got over my fears and starting flying a lot more inverted and closer to the ground, I found I was not using it nearly as much.  I do credit it with helping me improve my flying ability, but it also increases the complexity and setup required and must be used carefully for greatest benefit.

What it does is pretty impressive. With the Flight deck feature enabled a barometer(altimeter) senses that it is below a height threshold and it flips the heli level, It then uses its compass to sense direction and rotates the tail to the same direction it was in when you took off, then it uses the GPS module to hold the heli in place until you are ready to take control back. In addition if you flip it to Fly Home after it has spun up it will record that GPS location. The next time that you flip it to fly home it will fly back to the position and hover.

To work best it should be mounted clear of magnetic fields generated by your motor and other electronics,  a compass swing must be done to calibrate the system which involves spinning and rotating the heli.  Once the swing is done, and before using the flight deck feature it is recommended to use the Position Hold feature and calibrate the collective gain it needs to hold position. It is also very important to have your GPS switch turned off when you are first taking off.

gpsmount

Skookum SK-720 BE – This is a substantial improvement over the older SK-720’s that I have enjoyed for the last couple years. They feel great in flight are very vibration tolerant with their pinpoint gyros and can be hard mounted. If you like to use the Auto-Level feature they should be mounted on a supplied pad.  The BE’s maintain a better sense of the horizon when you are tossing your heli around than the Blues did. The BE’s power bus can handle more current, and it has a nice black anodized case rather than plastic. I do like the auto-level feature and use it on occasion if I have a question about my heli’s orientation before I get into trouble. It has saved me from a number of crashes and helps reduce the pucker factor a bit.

SK720BE

Kontronik Kosmik Blue Tooth module – This product gives you a graphical interface to set up your Kosmik ESC.  It is not a complete replacement for the ProgDisc which you still need to upgrade the firmware on your Kosmik. Currently it only works with the Android, but the iPhone version is supposed to be available soon.

KosmikSetup

I did not leave the BT module connected after I had configured my ESC so that it is not damaged in a crash, doesn’t add additional weight and doesn’t cause any 2.4GHz interference even though it can be configured to be disabled by default.

BlueTooth

Other Cool things that I tried this year.

Futaba BR-3000 Battery meter – I like this much better than my Progressive RC meter which you have to wait on to sing it’s little song and tell me I don’t have logging functionality EVERY time it starts up. When I am checking a bunch of batteries that just gets annoying. The Futaba unit is nearly instant, so I can look at a lot of batteries very quickly and it presents a lot of information at once. I still have both meters and frequently leave an adapter for Thunder Power batteries on one of them.  BR-3000

BR3000

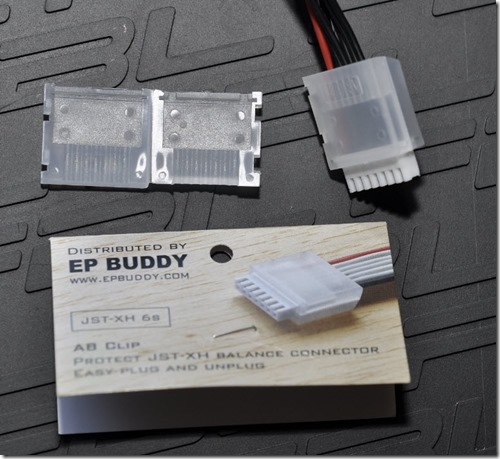
Balance Connector Protector – I don’t know how often you find your self pulling on the wires of your balance cables to pull them off a balance board, and sometimes prying them off, but I’m really liking this very inexpensive solution and have purchased a few packs of these for my batteries with JST-XH connectors.  AB Clips 6S  They are very easy to pull off of a balance boards. They come in 2S-6S sizes.

BalanceCableProtector

Yamaha EF2000iS Generator – I put it on a 50’ cable and can barely hear it. The Meanwell 1000watt PS in my charging kit is much louder than the generator.  Honda also makes a very nice generator that is very comparable. The features that I liked about the Yamaha compared to the Honda are that it has a fuel gauge and a means of cutting gas flow to the carburetor so it can be run dry without running the tank dry. With the tank vent closed I’ve never noticed any gasoline smell in my car when transporting it.  I happen to have a local place that I could have it serviced, but Honda does have a much larger network to service theirs.

Generator

New gas container – If you haven’t replaced your gas container in a while, you might want to consider getting a new one. I have not had any gasoline smell come from this container while it is in my car. In addition you have to press the green button on the spout after you have it in place to let gas out, and release the button and wait for it to drip a bit and pull it away. This removes the separate vent plug and makes spilling gas a lot less likely.

gastank


May 2024
M T W T F S S
 12345
6789101112
13141516171819
20212223242526
2728293031